This post may contain affiliate links.
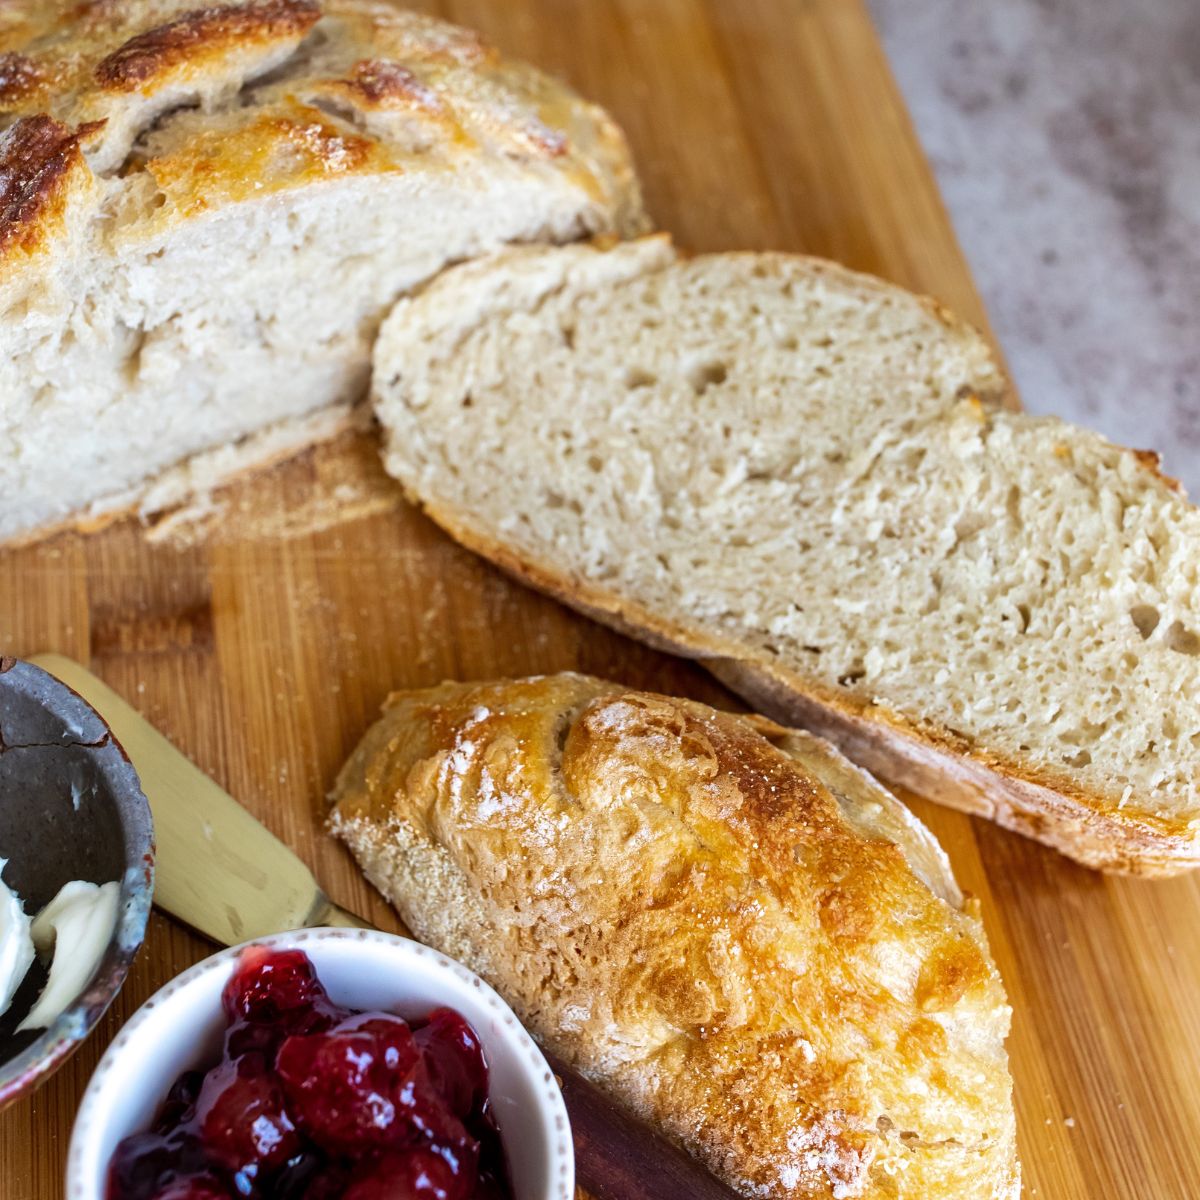
Overnight bread is made with four ingredients, no kneading and ready to bake overnight. Crispy golden outside, fluffy soft inside. You will never waste money on expensive boules of bread in the bakery again! This bread is going to change your life.
Why Make This Overnight Bread
This bread is almost too good to be true (but yet it exists and I am here to share!) My stepmom put me onto this bread and I haven’t stopped making it weekly since. You can add so many different ingredients to it to flavor it and make it different but the simple, four ingredients on their own is enough to have you running to the kitchen to bake.
No kneading required! Yep you heard that right, you simple whisk, mix and rest. There is only ONE resting period with this bread and it’s for about 12 hours or, overnight. It only takes about 40 minutes in the oven and it comes out incredible, golden, crusty and super soft and fluffy on the inside.
What is overnight bread? Is it better?
Overnight bread is just a very basic, simple bread recipe. It is quite honestly one of the easiest recipes to follow. There is no kneading or multiple rises needed. It’s simple mixed up, covered and left overnight to rise. That’s it! It’s similar to a crusty french bread boule you would purchase the the grocery store. It’s very rustic and mild in taste.
Ingredients Needed
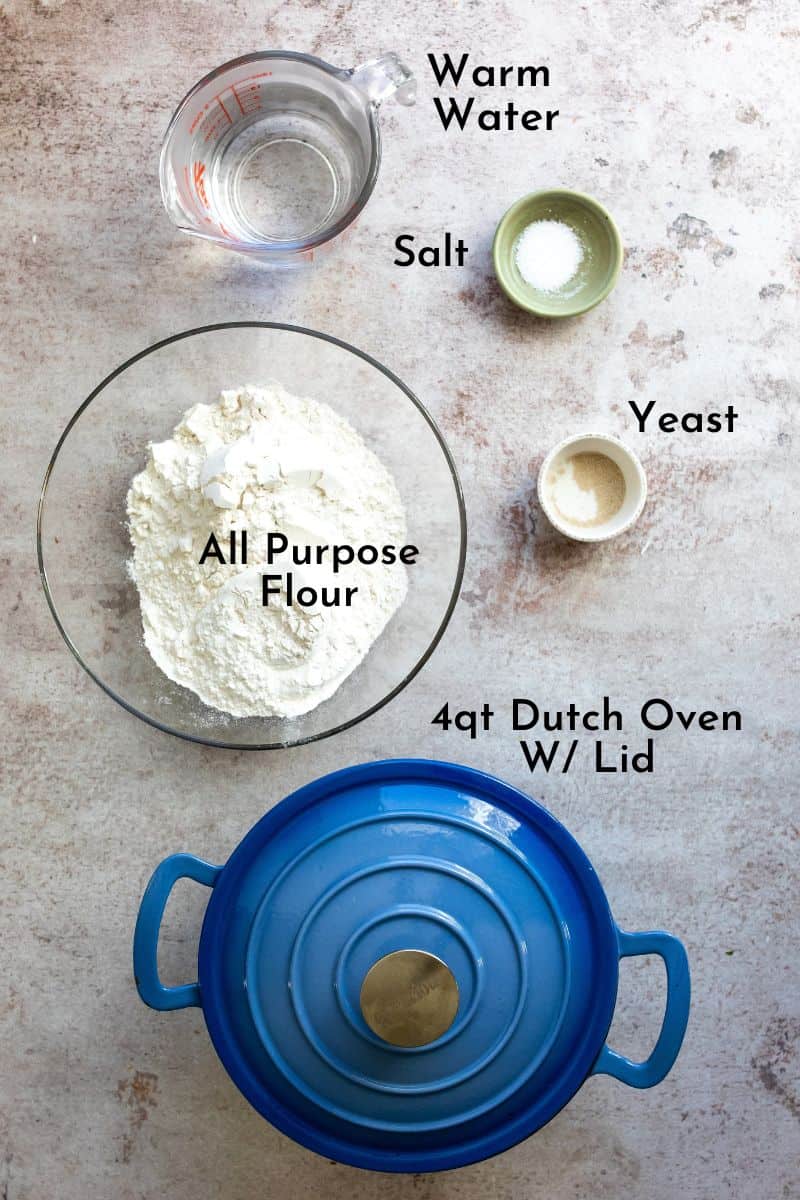
All Purpose Flour. This is the base of the bread. I have not tried using any other flour, but I am very confident all purpose gluten free mix would work.
Active yeast. I buy the little square packet sin the baking aisle. You only need a little bit of yeast for this recipe.
Salt. This is the flavor to the bread. Don’t skip this part, I accidentally did my first round and the bread was pretty lame without the saltiness.
Warm Water. Not boiling, not cold, but warm to hot water from the faucet.
Corn Meal or Additional AP Flour. This is to coat the service of the dutch oven. I also sprinkle a little on the top of the bread to give it a nice rustic look.
Steps To Make This Recipe

Step One. Make sure you have a ceramic or cast iron 4 qt dutch oven with an oven safe lid. If you don’t, I have linked a perfect one here. This one is almost identical to the one I have. They are great for baking and for soups, you will find a lot of use with this.
Step Two. In a large ceramic or glass bowl, add the flour, yeast and salt. Whisk really well to ensure everything is evenly mixed. Next, get warm/hot water from the faucet or microwave the water you have for 1 minute and 30 seconds. Slowly pour it over the flour mix.
Step Three. Using a wooden spoon or spatula, slowly mix everything together. Be sure all of the flour mix is soaked up and mixed in. You can press the spatula down on the flour mix to help absorb everything. You may need to add a little bit more water at this step since brands of flour can vary greatly! I would recommend less than 1/4 cup at a time, mixing and then deciding if you need more.
Step Four. Dough should be sticky, but not too wet. It should hold together somewhat well, not crumble apart. A good in between is perfect, be sure to look at the photo of my dough to compare.
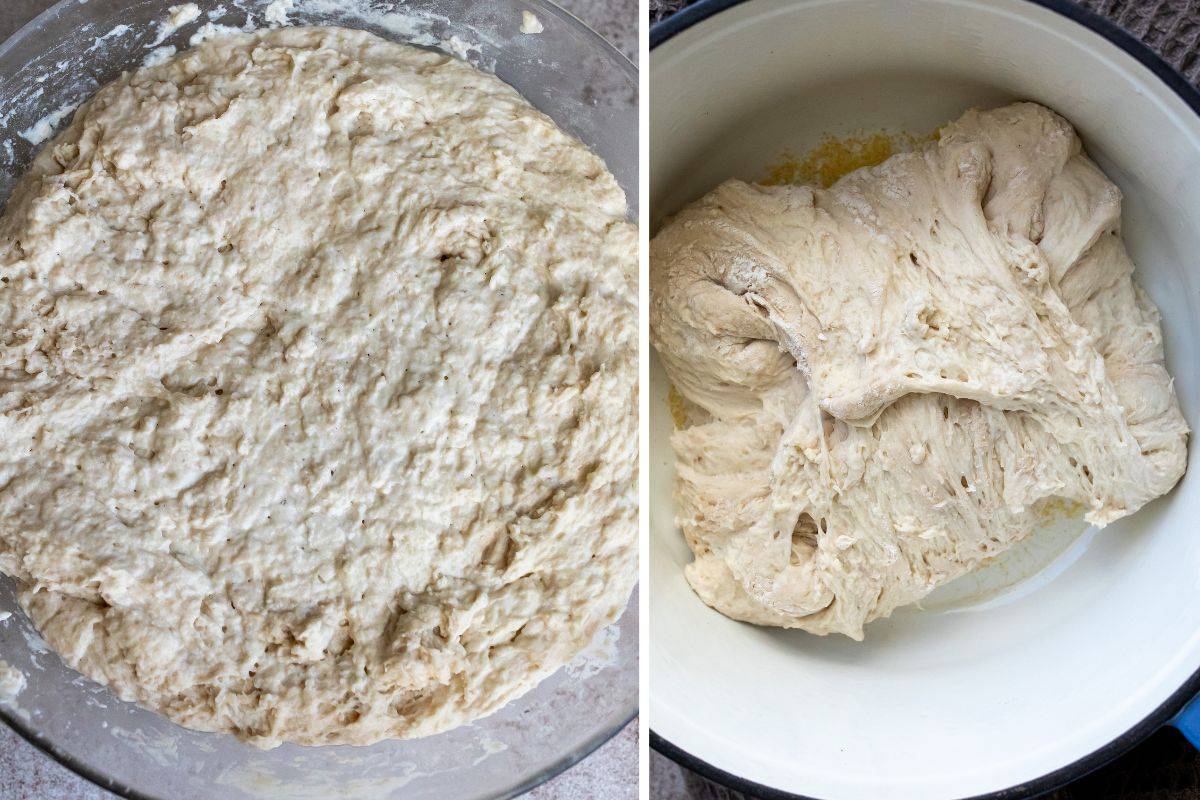
Step Five. Cover the glass/ceramic bowl tightly with plastic wrap. Make sure there is no air leaks. Leave in a warm area for at least 12 hours or overnight. The dough will double inside and appear humid in the bowl.
Time To Bake The Bread
Step Six. When you are ready to bake, preheat the oven to 450º. Place the dutch oven, without the lid on in the oven to heat up while the oven is preheating.
Step Seven. While the oven is preheating with the dutch oven in it, sprinkle a little flour over the dough, pull it out of the bowl, turn it upside down and fold it like an envelope. This just means to form a ball shape by folding the edges into one another (see photo for example). Pull the dutch oven out, sprinkle a little corn meal or flour on the bottom of the pot. Pick up the dough and gently place it in the pot. Cover it and place in the oven to bake for 30 minutes.
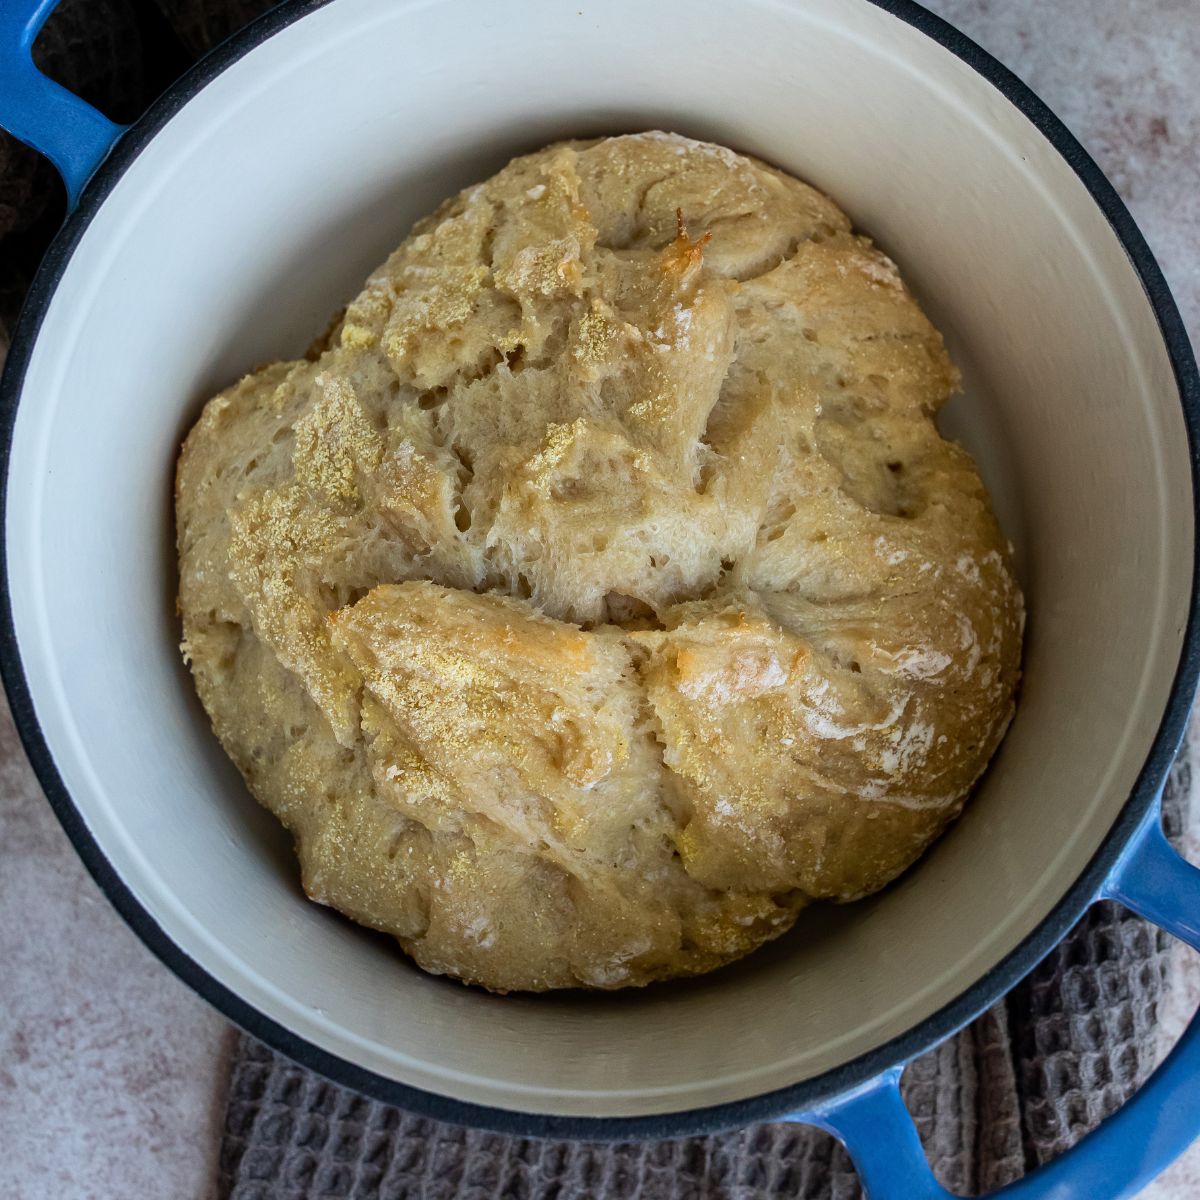
Step Eight. After 30 minutes take the lid off of the dutch oven with oven mits, carefully and cook uncovered for another 10 minutes or until the top of the bread is golden in color. Let the bread cool a bit before slicing.
Recipe Parings
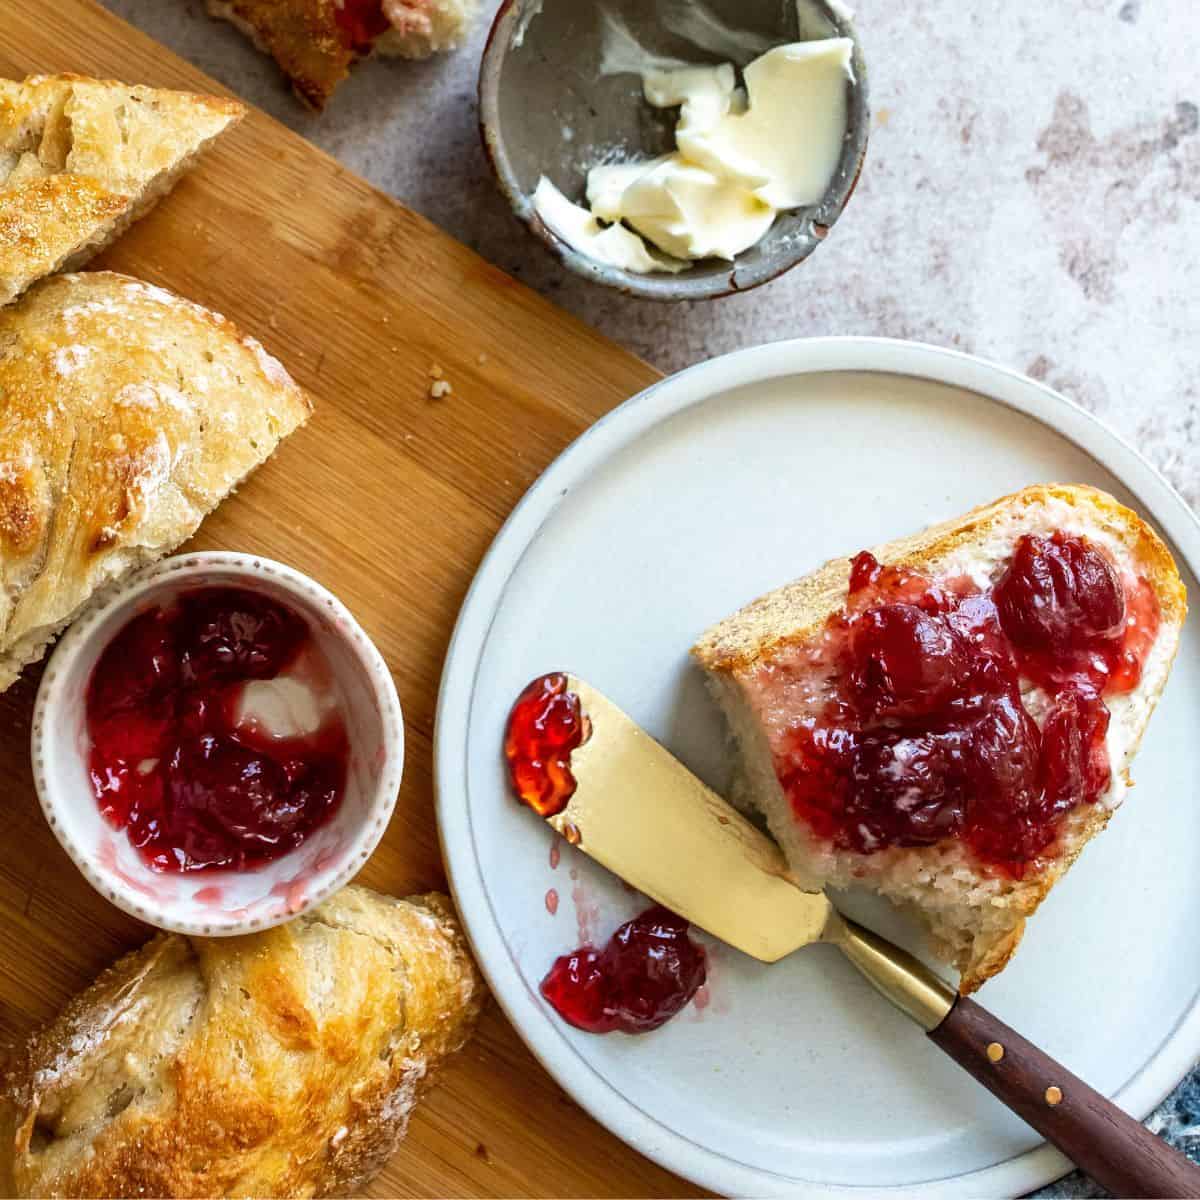
You can pair this bread with just about anything. I like to have mine fresh out of the oven with a little butter and jam. My Homemade Strawberry Jam tastes so good on this bread. You can pair it with a salad like my Asian Cabbage Salad or my Kale and Beet Salad. This bread would also pair wonderful with Baked Beans or Balsamic Bruschetta With Peppers. Really, the options are endless!
Recipe Variations
Yeast. Use active yeast/instant yeast or dry yeast.
Flour. I have only tried this recipe with all purpose flour. If you want to try to make gluten free bread, I would only suggest all purpose gluten free blend flour.
Add Ins. I have tried this bread with different herbs added in, it’s wonderful. I have also mixed in chopped roasted garlic. Add these in when you are flouring and folding the dough up to go in the oven.
Other Baked Recipes To Try

Side Dishes
Garlic Rolls
Side Dishes
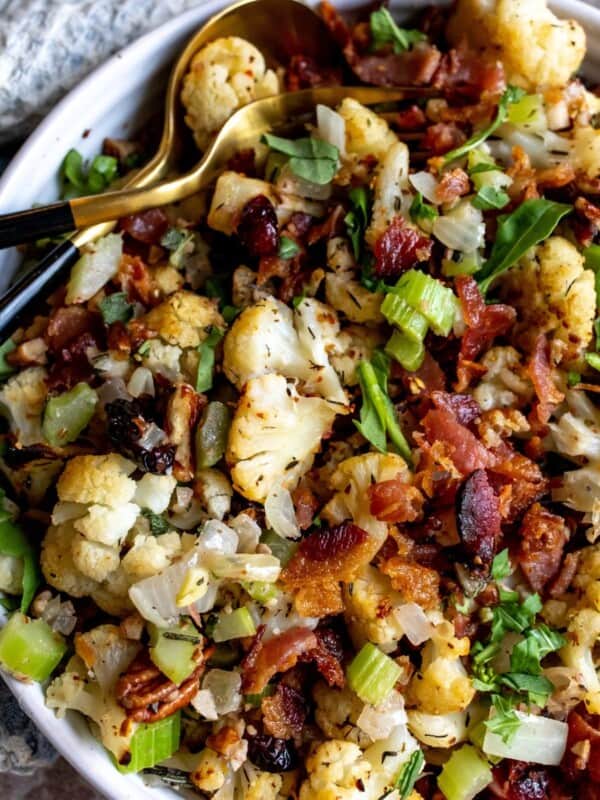
Delicious Cauliflower Stuffing

Side Dishes
Balsamic Bruschetta With Roasted Peppers

Side Dishes
Oven Baked Jalapeño Poppers
If you loved this recipe let me know! Also, follow me on Instagram & Pinterest for even more fun recipes to make you feel good from the inside out. Thanks for being here.

Overnight Bread
Equipment
- 1- 4 Qt Dutch Oven with lid Or something similar
Ingredients
- 3 cup all purpose flour
- ¼ tsp yeast, *see notes
- 1½-2 cup warm water, *see notes
- 1½ tsp salt
- 1 tbsp all purpose flour or corn meal , to sprinkle the raw dough with
Instructions
- Make sure you have a ceramic or cast iron 4 qt dutch oven with an oven safe lid. If you don't, I have linked a perfect one here. This one is almost identical to the one I have. They are great for baking and for soups, you will find a lot of use with this.
- In a large ceramic or glass bowl, add the flour, yeast and salt. Whisk really well to ensure everything is evenly mixed. Next, get warm/hot water from the faucet or microwave the water you have for 1 minute and 30 seconds. Slowly pour it over the flour mix. Start with 1.5 cups, you may need more as you mix since flour absorption can vary greatly.
- Using a wooden spoon or spatula, slowly mix everything together. Be sure all of the flour mix is soaked up and mixed in. You can press the spatula down on the flour mix to help absorb everything. You may need to add a little bit more water at this step since brands of flour can vary greatly! I would recommend less than 1/4 cup at a time, mixing and then deciding if you need more. Max would be 2 cups (which is what I typically need)
- Dough should be sticky, but not too wet. It should hold together somewhat well, not crumble apart. A good in between is perfect, be sure to look at the photo of my dough to compare.
- Cover the glass/ceramic bowl tightly with plastic wrap. Make sure there is no air leaks. Leave in a warm area for at least 12 hours or overnight. The dough will double inside and appear humid in the bowl.
- When you are ready to bake, preheat the oven to 450º. Place the dutch oven, without the lid on in the oven to heat up while the oven is preheating.
- While the oven is preheating with the dutch oven in it, sprinkle a little flour over the dough, pull it out of the bowl, turn it upside down and fold it like an envelope. This just means to form a ball shape by folding the edges into one another (see photo for example). Pull the dutch oven out, sprinkle a little corn meal or flour on the bottom of the pot. Pick up the dough and gently place it in the pot. Cover it and place in the oven to bake for 30 minutes.
- After 30 minutes take the lid off of the dutch oven with oven mits, carefully and cook uncovered for another 10 minutes or until the top of the bread is golden in color. Let the bread cool a bit before slicing.
Notes
Nutrition
Nutrition information is automatically calculated, so should only be used as an approximation.


This was so easy! I can’t even believe I made my own load of bread, I feel so accomplished. Thank you!
sooo good..!
Yay! really glad you enjoyed this one!
This is good. But why does my bread stick to the bottom of my Dutch oven? First bathes didn’t but the last couple have. Any idea? I sprinkle flour at the bottom.
Hi Alicia, a few ideas for you to help prevent sticking. Try adding just a little less water to the mix. Another idea would be to add cornmeal instead of flour to the bottom it tends to prevent sticking better than flour. Let me know if that helps!!! Xoxo
Hi, I love your recipes! I’ve made this bread a couple of times and love it!! Just have a question. Is it supposed to get rock hard after the first day? Other than that it tastes delicious! Thank you for your recipes!
Hi Christy!
It should not turn rock hard after 24 hours. Be sure to store it in an airtight ziplock bag on the counter for up to 2 days or up to 5 days in the fridge. It won’t be as crispy cutting right into it, however it crisps right back up in the toaster. I hope this helps! Happy Baking xoxo
This bread is frickin’ amazing! Could not be easier; I’ve never been much of a break baker because it’s seems like to much trouble. Well, not anymore! Thanks for such a great recipe!!! The crust is perfect, the interior is chewy, it’s perfection!
Hi Andi!
I am so thrilled to hear that you enjoyed this recipe and it was easy for you. That makes me so happy. Thanks for letting me know.
This was an easy and very good recipe. I will keep it and make again.
Can’t get over how easy this is to make me love this recipe. Thank you Bailey!
MAKE THIS RECIPE! it’s so easy and I’ve been making it for months. I have it memorized but always come back to dbl check. Thank you Bailey! We love this and your Garlic Roll recipe both are so easy.